ssl - godaddy上购买,申请SSL证书和使用的过程
访问量: 4997
最近,我们有个项目要上https. 所以就要购买这个东东。
购买 和申请SSL 证书 (使用的话看下面)
1. 购买。 1年价格2200, 2年一次行 85折。
2. 购买完之后, godaddy的 产品中心,就会出现SSL证书。 点击进入。(应该是点击设置吧。这里略了,太简单了)
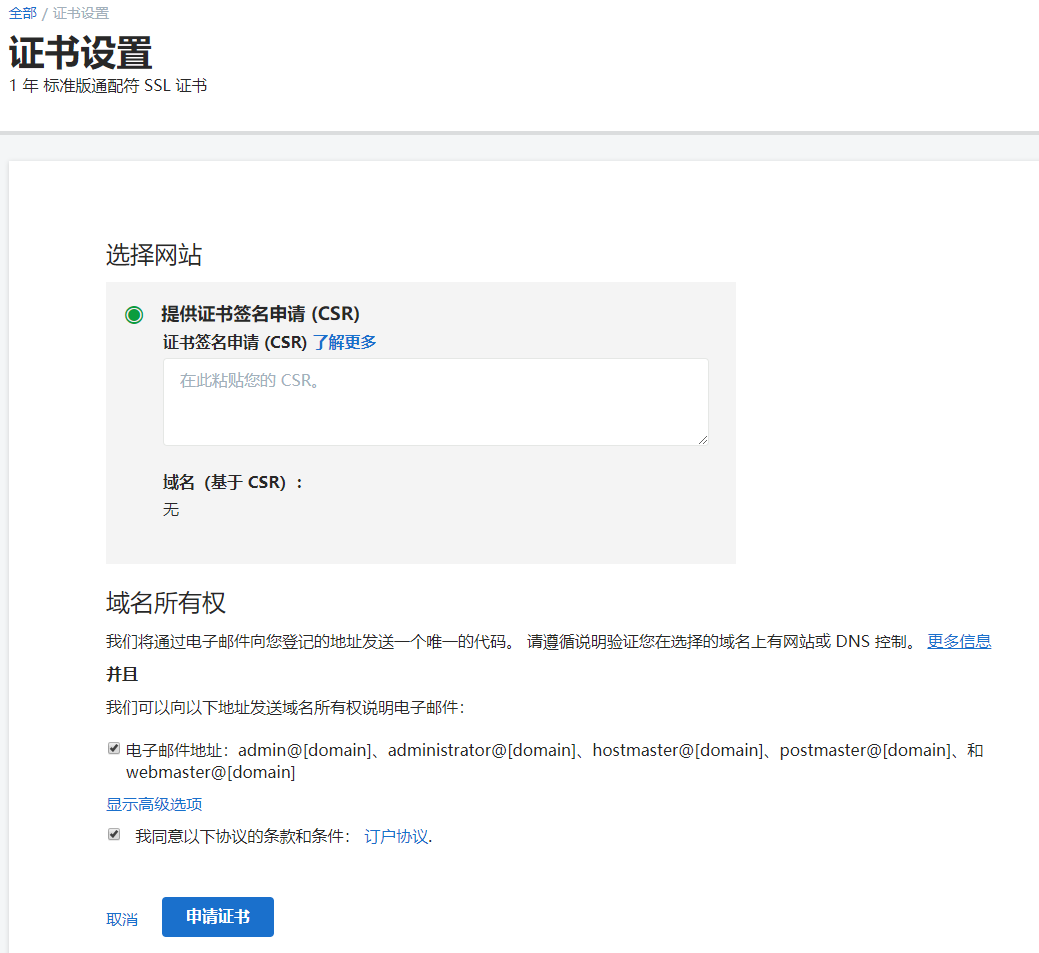
3. 之后就会出现页面,要求我们 提供CSR

4. 生成CSR 的办法,参考: https://www.godaddy.com/help/generate-a-csr-certificate-signing-request-5343?isc=cardigan
需要注意的是: 这个CSR 文件跟你的服务器有直接关系。 apache 是一种生成方式,nginx是一种生成方式。 所以我们一开始就要选择好nginx这样的生成方式。 参考: https://www.godaddy.com/help/nginx-generate-csrs-certificate-signing-requests-3601
5. 生成 csr 的命令:
$ openssl req -new -newkey rsa:2048 -nodes -keyout yourdomain.key -out yourdomain.csr Generating a 2048 bit RSA private key ........+++ ............+++ writing new private key to 'your_site.key' ----- You are about to be asked to enter information that will be incorporated into your certificate request. What you are about to enter is what is called a Distinguished Name or a DN. There are quite a few fields but you can leave some blank For some fields there will be a default value, If you enter '.', the field will be left blank. ----- Country Name (2 letter code) [AU]:CA State or Province Name (full name) [Some-State]:Ontario Locality Name (eg, city) []:Toronto Organization Name (eg, company) [Internet Widgits Pty Ltd]: company Technology INC Organizational Unit Name (eg, section) []:IT Common Name (e.g. server FQDN or YOUR name) []: *.yourdomain.com # 注意这里非常重要 Email Address []:[email protected] Please enter the following 'extra' attributes to be sent with your certificate request A challenge password []: An optional company name []:
6. 然后就会生成一个 key, 一个 csr 文件。
把这个csr文件的内容 全盘复制(注意不要有换行和空格)
然后,在godaddy 的后台提交,就可以了。 大概几个小时就可以审批下来。
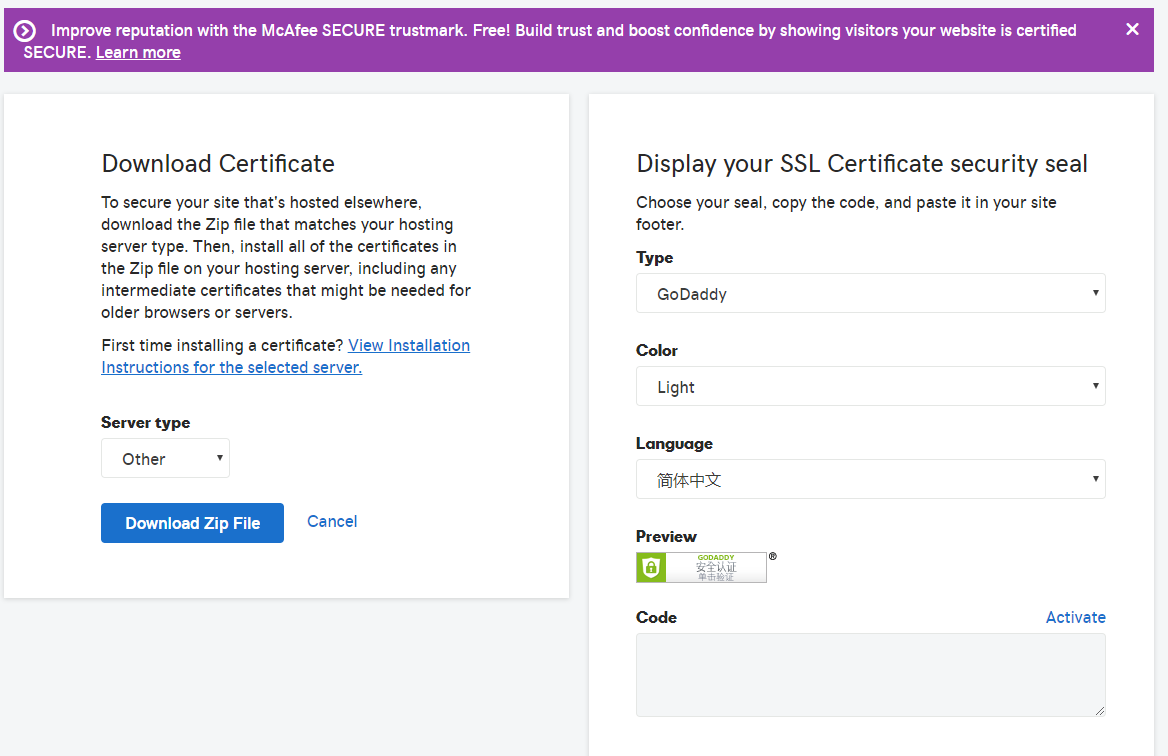
7. 进入到 我的产品, ssl 证书, 就可以看到,如何下载这个文件。 以及如何显示这个东东。

8. 由于我们使用的是nginx, 所以我们选择 other 来下载。
使用SSL证书
参考: https://www.godaddy.com/help/nginx-install-a-certificate-6722
1. 下载后,得到的在zip 文件中,有两个crt 文件。
a61asodaskdldkf.crt : 也叫作 certificate file.
gd_bundle-g2-g1.crt : 也叫作: certificate bundle file .
2. 然后,在我们最初申请这个 ssl 证书的时候,也有了两个key 文件。为了后续的配置方便,我们统一把这四个文件放到:
/opt/ssl_files 目录下。
/opt/ssl_files$ ls
a64aaf155fb5d81a.crt  your_site.csr  your_site.key  gd_bundle-g2-g1.crt
3. 根据这个链接, 来配置nginx 。(http://nginx.org/en/docs/http/configuring_https_servers.html#chains)
我们用的是 ubuntu 下的nginx,步骤如下:
3.1 把两个文件cat 后链接起来:
$ cat a64xxx.crt gd_bundle...crt > your_site.chained.crt (一定要注意这个顺序不能变)
  server {
          listen       443 ssl;
          server_name  www.your_site.io your_site.io;

          keepalive_timeout   70;
          ssl_certificate     /opt/ssl_files/your_site.chained.crt;
          ssl_certificate_key /opt/ssl_files/your_site.key;
          ssl_protocols       TLSv1 TLSv1.1 TLSv1.2;
          ssl_ciphers         HIGH:!aNULL:!MD5;
          client_max_body_size       500m;
          charset utf-8;
3.2 测试 : $ nginx -t 一般来说不会有问题。
3.3 使用命令行测试:
$ openssl s_client -connect www.you_site.io:443
会打印出一堆文字。 基本没问题
3.4 使用浏览器打开 对用网址。 只要能打开,就说明配置没错。
3.5 保证该页面中,引用的都是 https 的外链, 不要包含一个 http链接, 那么在页面的左上角,就会出现 "[lock] 安全" 这样的图标了。 参考: https://www.inmotionhosting.com/support/website/security/ssl-lock-display